
Greetings All-
Last week I promised you an extended version of the pastel demonstration I did as part of a workshop at Stuhr Museum recently. Huge thanks to Linda Welsch for providing the photos.
Let's pull back the curtain of mystery, shall we?

While I don't worry about details at this point, I do spend some time getting the basic shapes where I want them. Giving this step some attention helps avoid problems like head banging and gnashing of teeth later on.

A quick thin layer of a dark cool color to develop shadows and tie the shapes together ...

... some local color to further develop the shapes and values, a dash of red in the foreground just for fun ...

... seeing what things look like from several feet away - or better yet, from across the room ...

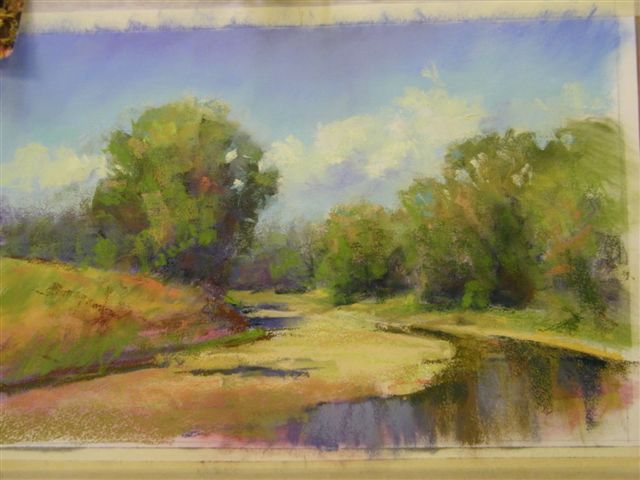
adding sky color in several blues not only gives the painting a logical element but gives the trees their shape ...
An hour into the painting it's time for me to put my feet up and let the workshop participants start in.
I don't work this quickly in my studio practice but I know these folks are anxious to dive in and get their paper dirty. The rest of the day will be spent advising and helping the students with their projects.
Since it's not a bad start for a painting, my plan is to finish it at home...

... which I do.
After a couple of days spent ignoring it, I came back with a fresh perspective (pun intended). Several thoughtful hours were spent refining the shapes, colors and values. I've tweaked, untweaked and re-tweaked multiple times. I've stepped back, stepped back even farther, and farther yet again to make certain it 'reads' properly. I've peaked at it from around the doorway and checked it in a mirror. Even now, seeing it a new context, (online and smaller) I see some things that need re-re-tweaking. Or is that un-re-tweaking?
There you have it. Your own private workshop from the comfort of your easy chair. All my secrets revealed.
Class dismissed.
6 comments:
My daughter was just talking about painting. I'm going to share this with her!
Please do!! Glad to know it was helpful-
Hi Patty,
Love seeing the "steps." I find that taking a photo and seeing my paintings on the computer gives me a fresh perspective, too. (among the other techniques you mentioned, which I also use.)
The finished painting is wonderful!
It's amazing how the brain becomes "immune" to things we see again and again.
Anyone else have any tricks they'd like to share?
I'm glad you published the process shots and added descriptions. It still seems like magic to me--I especially like the shot of charcoal over outline. I'm mystified by the way in which the shadowy underlayers support a fully articulated top layer!
Magic? To you? You who creates such beautiful watercolors...now that's magic!
Post a Comment